Public-space learning: watch the place first, then draw what it needs.

Unit 1 · Site reading

Observe Before Drawing

Site analysis is the discipline of noticing. In this unit you will learn to separate what a place contains from what it is doing, and to record both so carefully that your later design moves feel inevitable rather than arbitrary.

3 visitsAt least 45 minutes each, at different times
1 base mapScale 1:200 or 1:500 is typical for a small park
6 lessonsInventory through synthesis
1 diagramThe synthesis that ends the unit
Lesson 1.1

Inventory Is Not Analysis

New designers often arrive at a site with a clipboard and leave with a list: six benches, four plane trees, one drinking fountain, a broken lamp. That list is an inventory, and it is necessary, but it is only the first pass. Analysis begins when you ask what each element is doing for the people who use the place. Are the six benches occupied? By whom, and when? Do the plane trees shade the benches or the path? Is the fountain the reason a group of runners stops here every morning?

Keep two columns in your notebook. On the left, what is there. On the right, what it does, or fails to do. The right-hand column is where your design argument will eventually come from.

Lesson 1.2

Start with Who Is Already There

In the early 1970s William H. Whyte's Street Life Project filmed plazas in New York City with time-lapse cameras, including the plaza of the Seagram Building. His team counted where people sat, how long they stayed and how they moved. The findings, published in The Social Life of Small Urban Spaces, shaped New York's 1975 zoning amendments for public plazas, including a requirement for sittable space.

You can run a modest version of that study with a pencil. Choose a fixed vantage point, set a timer for every fifteen minutes, and mark each person present on a copy of your base map using a simple code: a dot for sitting, a cross for standing, an arrow for passing through. Note approximate age group and whether people are alone or in groups, but never record names or identifying details. After three visits you will see patterns that a single walk-through would miss.

Observe with care

Inclusive observation means noticing who is absent as well as who is present. If older residents, children or women alone rarely appear in the evening, that absence is data. Ask why before you assume.
Lesson 1.3

Plan Your Three Visits

Each visit is designed to capture a different rhythm of daily life. Select a visit to see what to look for.

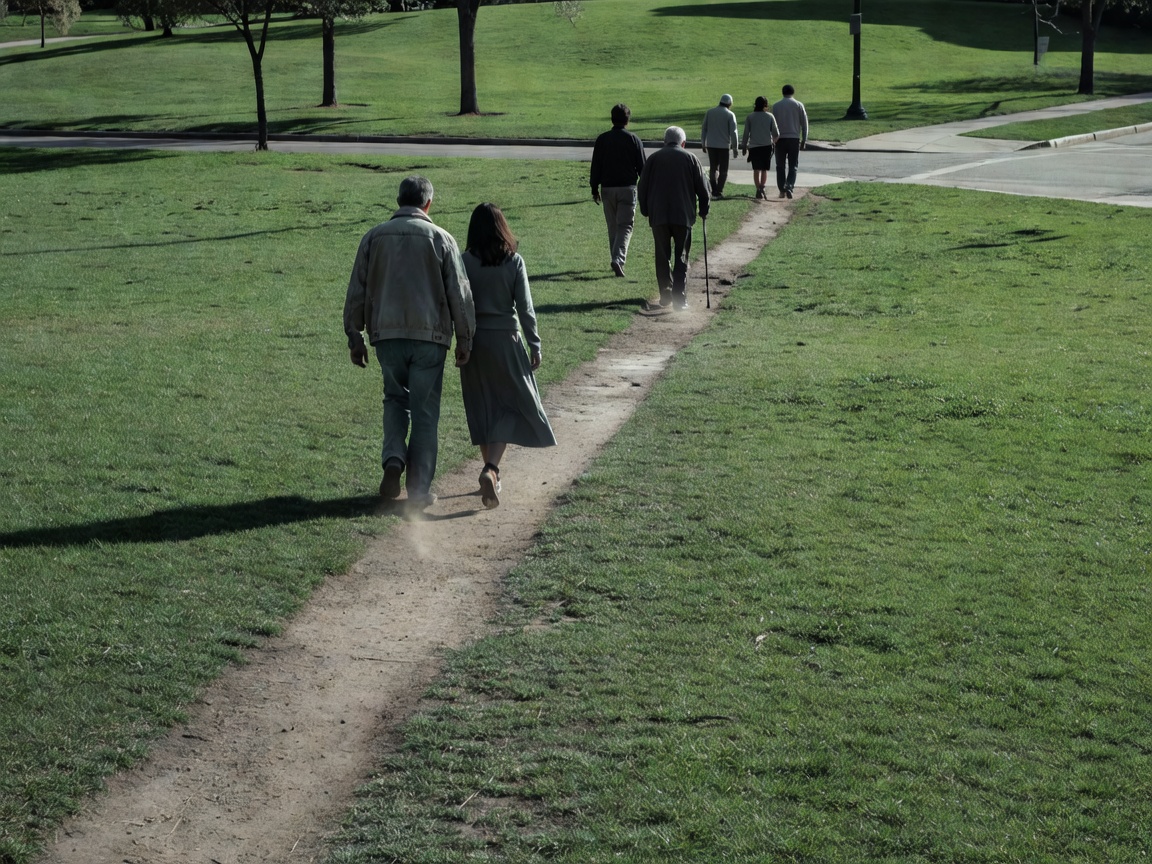
Commuters, dog walkers, school drop-offs. Morning reveals the necessary trips Jan Gehl describes, the movement that happens regardless of quality. Map desire lines, the worn shortcuts across grass, and note where low sun makes some benches pleasant and others glaring.

High-contrast photograph of residents walking along a worn diagonal desire line across a park lawn toward a street corner
A desire line is a vote cast with feet. Record it before deciding whether to pave or redirect it.
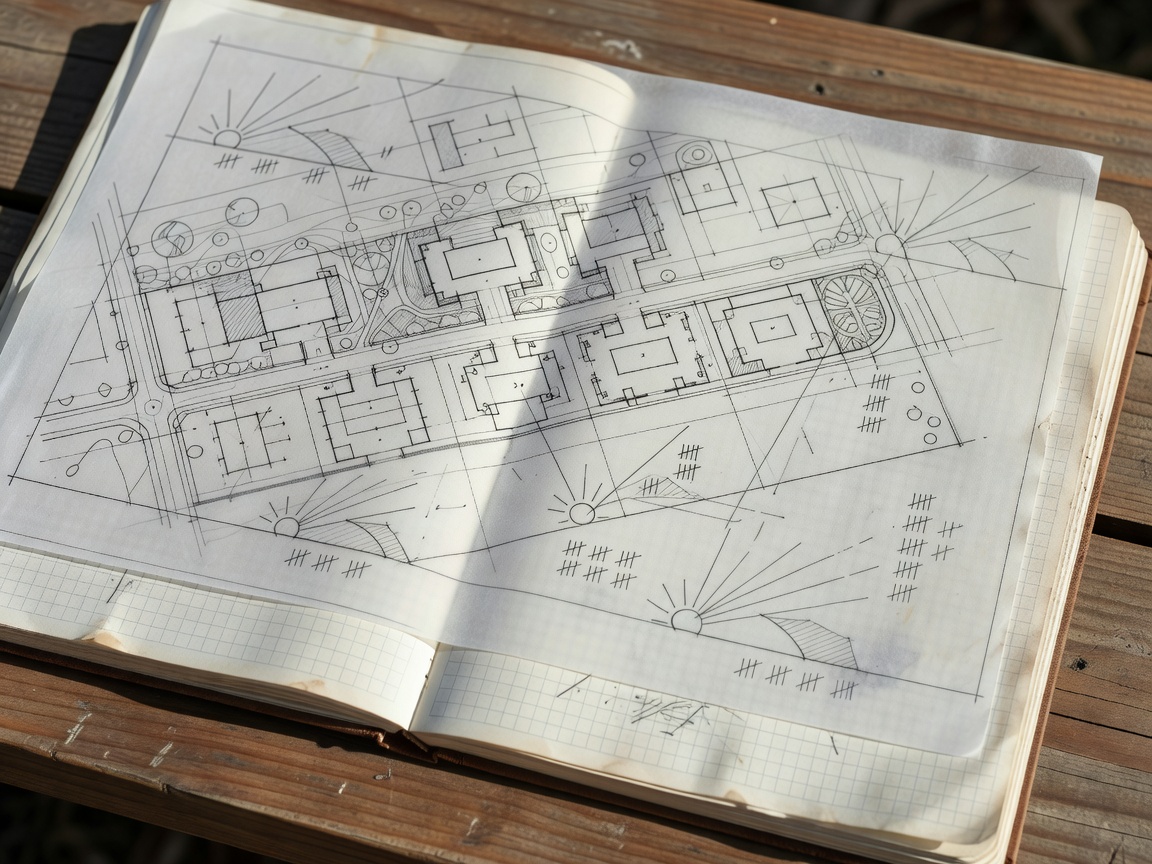
Field notebook and tracing paper overlay on a site plan, with hand-drawn sun angles and tally marks
Tracing paper overlays let you compare readings without redrawing the base.
Lesson 1.4

Layer the Physical Site

Ian McHarg's Design with Nature (1969) popularized the overlay: separate transparent maps for slope, soils, drainage, vegetation and other factors, stacked to reveal where conditions align. At the scale of a small park you do not need GIS. Use one tracing sheet per factor.

Mark slope direction with arrows and note where puddles form after rain. Record tree canopy edges, because root zones constrain where you can dig. Trace afternoon shadows from surrounding buildings; in a dense neighborhood, a plaza that looks generous on paper may be in shade for most of the winter day. Note prevailing wind and any corners where it accelerates between buildings.

Lesson 1.5

Read Edges and Legibility

Kevin Lynch's The Image of the City (1960) proposed that people understand urban places through paths, edges, districts, nodes and landmarks. Apply those terms to your site. Which path do people treat as the main route? Which edge is permeable, like a row of shopfronts, and which is a barrier, like a blank wall or a fast road? Where is the node, the place people meet? Is there a landmark, such as a large tree, a statue or a kiosk, that people use to give directions?

Lesson 1.6

From Notes to a Defensible Claim

End the unit with a synthesis diagram on a single sheet. Show the three strongest opportunities, for example a sunny edge that already attracts sitters, and two clear constraints, such as a drainage low point or a fast road. Write a one-line claim beside each mark, in the form "Because we observed X, the design should Y." That sentence structure is the bridge between observation and proposal, and you will reuse it in every unit that follows.

Continue to Shared Space